
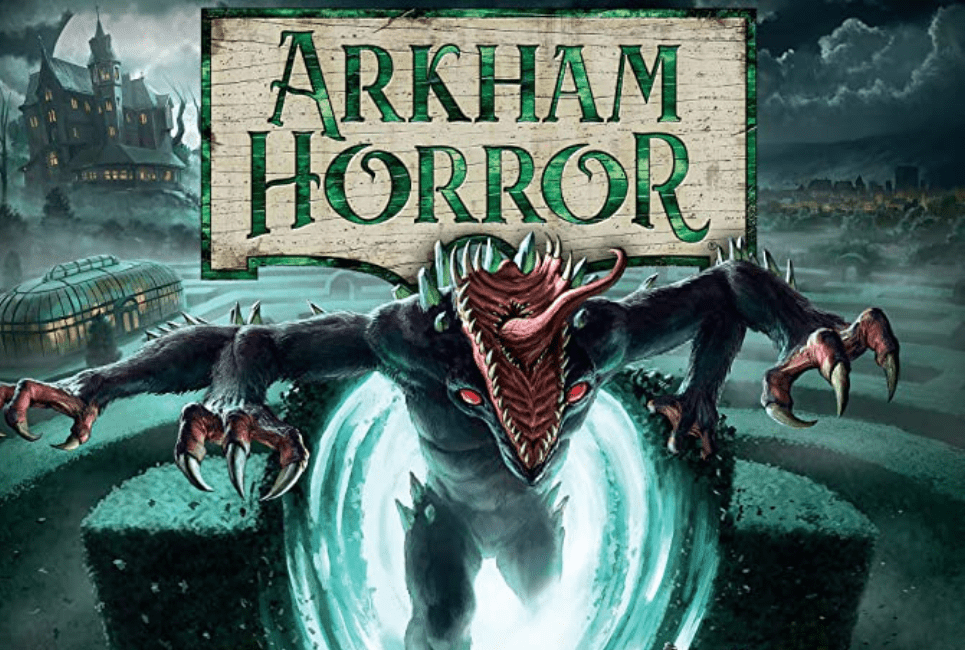
Arkham Horror is a fun game for people interested in the world of H.P. Lovecraft. It has been remade and re-released multiple times now and has three editions. It is part of the Arkham Files series of games that all revolve around eldritch horrors and trying to keep your sanity in this otherworldly place.
I have been an avid board game fan since I was a child, and I enjoy figuring out a board game and the strategies you can take to have a higher likelihood of victory. I prefer games that do not have a guaranteed way of success but rather ones that still leave things to chance to add spice into a game.
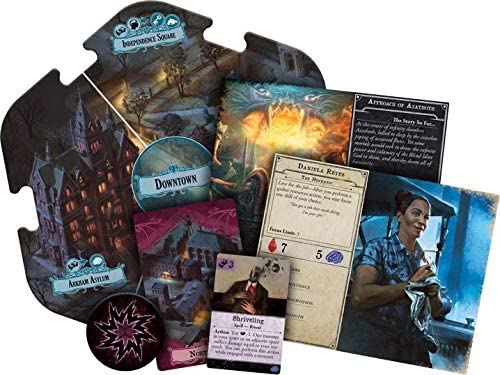
Let’s get into the newest iteration of the Arkham Horror Board game and what it entails.
Essential Info (Playtime, Players, Age, Complexity, Type of Game)
Players: 1-6
Setup time: 10-20 minutes
Playtime: 2-3 hours
Recommended Age: 14+
Designer: Nikki Valens (With inspiration from Richard Launius & Kevin Wilson)
Type of game: Cooperative
Arkham Horror is a dice-rolling narrative-driven board game. Something for those who want to indulge in a cult classic while delving into cosmic horror. While the gameplay might seem daunting for first-timers, once you get past the first few rounds, you will find your group moving seamlessly into the thick of things. There are various scenarios to play out that change due to the event and headline system in the game, so it has incredible replayability that only compounds once you add the expansion packs.
Setup
For this, we will be using the third edition of the Arkham Horror board game, so the setup and gameplay will have changes from the other older editions. It is entirely different from the card game, so do not use this to set up the card game.
Step 1. The first step in setting up the game is to choose which scenario you are playing. Agree with your friends on which one seems fun, as the scenario changes how the board tiles are deployed. I recommend “Approach of Azathoth” as your first scenario for beginners due to its simplicity. It has many monsters and a Mythos Cup that the investigators (the players) favor. So long as you do not take too long, this is an easy mission to clear.
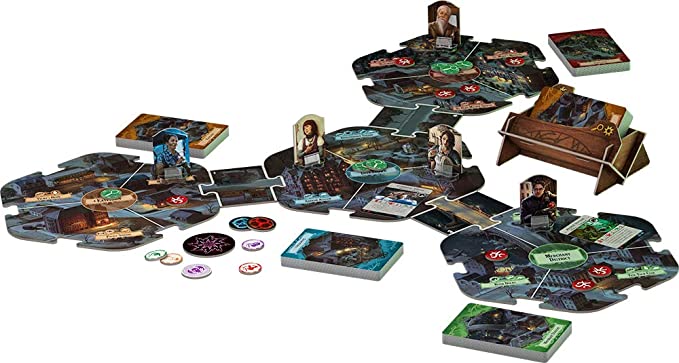
Step 2. Pick out the Scenario card from the plastic pack. Turn it over and look at the map layout; for this example, you will need Northside, Downtown, Easttown, Merchant District, and Rivertown. Connect them using the street tiles by following what the layout says; in “Approach of Azathoth,” you will need two park tiles, three lantern tiles, and two bridge tiles. Then create the encounter deck by shuffling the cards corresponding to the board tiles used. There are eight cards in each of these decks; place the decks near their corresponding neighborhood.
Step 3. Setting up the event deck is a simple process and comes next. Each neighborhood map tile has its own event deck. However, each scenario only includes specific cards from those decks. Look at the lower left side of the card and collect the 24 event cards for the scenario you are playing. Shuffle them together and place them into the event deck holder.
Step 4. You must read the scenario card for the monster deck as each scenario has different monsters attached. For this example, there are two hooded stalkers, an abyssal servant, an eyeless watcher, a high priest, two occult ritualists, three robed figures, swift byakhee, and all hounds of Tindalos. With this in mind, put two of the robed figures in their designated spots in Rivertown and Downtown. All other listed monsters are shuffled together and put next to the event deck, ready for use.
Step 5. Mythos Cup is a new addition that the designers implemented in this edition. This can be any opaque container, such as a bag or a bowl that can hold all Mythos tokens. You must provide your own cup as the box does not have this included. The back of the scenario sheet shows what tokens need to be used. For “Approach of Azathoth,” it is three Spread Doom tokens, two Spawn Monster tokens, two Spawn Clue tokens, two Read Headline tokens, one Gate Burst token, one Reckoning token, and three blank tokens. I will explain what the tokens do later.
Step 6. Prepare the Headline deck. Take thirteen cards at random and shuffle them face down. Then return the other Headline cards to the box.
Step 7. Assets and Displays come next. Assets would be the Allies (blue), Spells (Red), and Items (green) decks. These are shuffled separately and placed next to the board. Then the top five cards of the item deck are drawn and placed face-up in a row next to the decks. This is called the Display, representing items acquired by buying or during an encounter.
Step 8. Separate all tokens by type and keep them nearby for easy access. There are Damage tokens (red), Horror tokens (blue), Focus tokens (varying focus symbols), Money tokens (green), Remnant tokens (has tentacles), Clue/Doom tokens (magnifying glass and a doom marker on one token)
Step 9. The Archive deck is labeled numerically and used in various scenarios as the narrative backdrop of the game. Keep them in that order near the board to draw from later on.
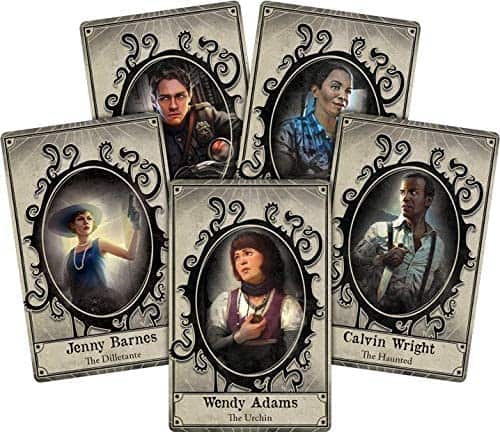
Step 10. Choose Investigators, every player gets one, but each investigator has a unique set of skills and abilities. Once everyone has chosen a character, take the investigator tokens and place them into the plastic stands and onto the board. For “Approach of Azathoth,” this would be in the Train station in Northside. Hand everyone their starting possessions and money tokens, identifiable by looking at the back of the investigator’s sheet. Note that some investigators can choose from two or three starting options.
Step 11. Next is placing starting clues. For Clues, draw the top three cards from the event deck. For each card, place one Clue token in the central area of the neighborhood it belongs. Then take it and the top two cards of the neighborhood it corresponds to and shuffle the three cards. Place it on top of the encounter deck of its neighborhood. Repeat this for the other two cards drawn for clues.
Step 12. After that are the Doom tokens; check the back of the scenario card and place the Doom tokens accordingly. For “Approach of Azathoth,” these would be on Arkham Advertiser, Independence Square, Velma’s Diner, the Unvisited Isle, and the Black Cave. Once this is done, draw the bottom card of the event deck and discard it; place one Doom token in each space of the card with a Doom icon next to it (It looks like the Doom token).
Step 13. Resolve the “Finalize Setup” on the back of the scenario card. For “Approach of Azathoth,” this is to take cards two and three from the archive and place them face up. This is known as the Codex and generally provides rules and narratives specific to the scenario. Then create the anomaly deck by shuffling the “Temporal Fissure” anomaly cards.
Step 14. With that being done, you can now begin the game
While this may seem complicated, most of these steps keep the play area clear and understandable. When done, it would take a short time to set up compared to the game time.
Gameplay
The Flow of the Game
The game takes place over the course of numerous turns, with each turn having four phases. Later I will discuss these phases in detail but for now, let’s talk about the game itself. Each turn, the players get two actions to move and interact with the city of Arkham. Whether they spend it investigating, moving, or fighting monsters, each player only has two actions per turn.
After the players come to the monsters, they activate and try to attack nearby players or move towards the closest player. Certain monsters get exhaustion after performing specific actions, so they pass their turn and ready up for the next turn.
After the monsters finish, the encounter phase begins. Here the investigators (players) take turns resolving an encounter in their area. This is important because this could lead to a victory or jump the Doom counter so far forwards that it ends in defeat. Additionally, it provides a short narrative of what the players are doing and what the investigator experiences in that area.
Lastly is the Mythos phase, where each player draws two tokens that could do just about anything. It could give clues, spawn monsters, or even spread doom. Once everything is finished, the next player action phase begins.
Core Concepts
The primary interaction in this game is through skill tests. There are cards instructing you to roll a specific check or symbols depicting what skill you need to roll. Then roll as many dice as you have points in that skill; for example, a lore skill of four would mean four dice are rolled. For these tests, you succeed on a five or a six, and each die that rolls a success adds to the total number of successes you attain. You often want more success, so it might be best to let the ones with a higher skill total handle tests.
Another core concept is damage and horror. Your investigator can take only so many hits before collapsing, and their mental state needs to remain somewhat healthy. Otherwise, they, too, shall fall. Try to keep those damage tokens low as too many, and you will have to start over as a new investigator with none of the clues or equipment.
While there is no definite win condition, a general rule of thumb is that by completing the archive cards in the Codex, you will progress through the game towards the end of it. Things that collect Doom tokens are bad, and Clue tokens are good, so make sure that you have plenty of clues to solve the happenings in Arkham.
However, there are many loss conditions, even without considering specific scenarios, only loss conditions. If there is too much doom, if monsters overrun the city, or if all the investigators are killed, the game ends.
Phases
Here are the phases in more detail.
Action Phase
This is the player’s phase, where any player can take their turn but must finish before another player can begin. Each player has two actions per turn, and here are the actions they can do.
- Move
- Move your token up to two spaces (central zones are not considered spaces); you can spend money to move up to two additional spaces. Each space costs one dollar. If you enter a space with a ready monster, you become engaged; this prevents you from moving or resolving an encounter.
- Gather Resources
- Gain one dollar
- Focus
- Choose one skill and gain a focus token of that skill. The skill value is increased by one for as long as you have it. This means that you can roll an additional die for that skill test.
- You can expend a focus token to reroll any die in a test, even if the token does not match the specified skill test.
- Each investigator has a different focus limit; you cannot exceed that limit unless circumstances dictate otherwise.
- Ward
- Make a lore test. For each success, you remove one doom token from your area. You gain one remnant token if you remove two or more doom tokens.
- Remnant tokens can be used while casting a spell to prevent horror or when asked by encounters and other specific cards.
- Attack
- You can attack a monster in your space even if they are not engaged with you or are engaged with another investigator. In doing so, you engage the enemy monster and then resolve a strength test. On the exhausted side of the monster card, it will state how much damage it needs to take and the strength modifier and evasion modifier it has. This is depicted by the heart, strength, and eye icons, respectively.
- You deal damage based on the number of successes; if you successfully eliminate a monster, you gain the rewards section of the monster(if there is any) and the amount of remnant tokens depicted in its upper right corner.
- Evade
- If you are engaged with a monster, you can only use the focus, attack, and evade actions. So to escape, you either kill the monster or evade it. Evade is a skill test versus the monster applying the modifier the monster provides.
- Against multiple monsters, you roll an observation skill test with the one monster’s modifier that leaves you with the fewest dice. From there, roll, and each successful die allows you to exhaust a monster.
- Exhausting a monster prevents them from automatically engaging with a player, so it lets your other companions run by without any problems.
- If you successfully evade all monsters engaged, you can perform an additional action.
- Research
- This is an observation skill test, with each success allowing you to place a clue on the scenario sheet.
- Scenario sheets typically require a certain number of clues before completion, which is one of the main ways to progress.
- Trade
- Using a trade action allows you and all other investigators in the same space as you to exchange allies, items, spells, money, clues, and remnants.
- Investigators cannot trade health, sanity, talents, and conditions unless something says otherwise.
- Component
- These are unique actions that are stated on cards. It will say “Action:” in bold before describing what the action does.
- Getting Delayed
- There are effects and cards in the game that may delay your investigator. In this scenario, knock your investigator token over. You stand up during the next action phase using an action. This is not optional.
Monster Phase
Before we talk about the phase itself, we must speak of the states monster cards can be in. There are three states: Ready, Exhausted, and Engaged.
Ready monsters have the darker side of the card up. The Ready state means that a monster can move or attack. If a Ready monster is in the same space as an investigator, it automatically engages the investigator.
Exhausted monsters have the lighter side to represent that they are exhausted. An exhausted monster cannot move, attack, or engage investigators.
Engaged Monsters should be but not necessarily be kept with their exhausted side up, and this is to see what the investigator is up against easily. Any number of monsters can be engaged with a single investigator, but most monsters can only engage one investigator at a time.
Now let’s look at the phases within the monster phase.
- Ready monsters Activate.
- Depending on the type of monster, they have their actions and behavior that they follow. However, a rule that all monsters have to follow is that they move a number of spaces equal to their speed unless it says “moves directly,” in which it does not travel but instead goes directly to the location described.
- Hunter monsters move and try to engage specific investigators. It will state the target, for example, “lowest strength or most clues.”
- Patrol monsters move towards locations such as places with “most doom, or unstable space” (Unstable spaces are places marked with a doom icon.)
- Lurker monsters do not move but rather cause harmful effects to happen. For example, causing doom.
- Lastly, when a monster enters an investigator’s space, it stops entirely and engages that investigator.
- Engaged monsters Attack
- There is no roll here; the engaged monsters deal damage equal to the damage and horror symbols on the bottom of the card.
- Exhausted monsters Ready.
- The exhausted monster did not move or attack this round but is now ready to do so in the next round. Since it is now ready, it engages an investigator if one is in its space. Flip the card to the ready side to represent it.
After this, the monster phase ends.
Encounter Phase
During this phase, each investigator draws and resolves an encounter card unless engaged with a monster. They may resolve it in any order of their choosing. However, they must fully complete the encounter before the next player begins to resolve their encounter. The encounter decks are segregated by location, so draw from the neighborhood you are standing in. If you are in a street tile, there is a separate street deck to draw from.
Neighborhood spaces have the additional benefit of indicating what events are likely to happen. On the tiles, there are icons above the name of the space you are in. There the icons will be pointing at one another; the one on the left signifies what will most likely be tested, while the one on the right is the reward,
Once an encounter is resolved, return it to the bottom of the deck; however, if it is an event card, they are returned to the deck only if the player did not gain the clue. If the clue was gained, discard that card.
That resolves the encounter phase.
Mythos Phase
Here every player draws two tokens from the mythos cup. The cup moves clockwise around the table; after you draw the tokens, resolve them but do not return them until the cup is empty. The tokens are as follows.
- Spread Doom
- Discard the bottom card of the event deck face up and place one doom token on the space marked with the doom symbol.
- Spawn Monster
- Draw the bottom card of the monster deck and spawn as instructed on the card.
- Read Headline
- Draw and read the top card of the headline deck. It only affects you unless specified. Then discard that card to a discard pile, if there are no cards to draw place one doom on the scenario sheet.
- Spawn Clue
- Take the top card of the event deck and place one clue token in the central area of the corresponding neighborhood. Then shuffle it back into the deck.
- Gate Burst
- Take the top card of the event deck and place one doom token in each space of the corresponding neighborhood. Then shuffle the drawn card and the entire event discard pile together and add those cards to the bottom of the deck.
- Reckoning
- Resolve all effects on things in play that have the reckoning icon.
- Blank
- Nothing happens
Anomalies
While not used in every scenario, anomalies are signs of a situation getting dire. You place anomaly tokens on the central space of that neighborhood tile with three doom tokens on it; additionally, if a neighborhood has a total of five doom, place an anomaly token. Do not place multiple anomaly tokens in the same neighborhood.
If doom would be placed in any neighborhood space with an anomaly, put it on the scenario sheet instead.
Using the Ward action and resolving anomaly encounters, remove doom tokens from your space; the anomaly token will be removed once devoid of doom tokens.
During the encounter phase, if an investigator is in a space with an anomaly, you must resolve an anomaly encounter rather than a normal one. Resolve the section that corresponds to the amount of doom in your space.
Strategies & Tips
While there are no foolproof strategies, here are a few ways to have a greater chance at success.
Note-taking
A lot goes on in the game, and being able to respond to rapid changes is key to winning this game. I usually take a few notes on what is collecting a large amount of doom or what events and scenarios are going on. This is to keep track of what needs to be taken care of and who on the team is available and capable of solving the problem.
Numbers
Having more investigators is extremely helpful, not only for actual players but having allies in-game and following you around is powerful enough to change the outcome of a crucial roll. For players, while it does go from one to six, I find that the best number of players is four. Enough to handle the problems in the city, and few enough so that there is hardly any downtime between turns.
Focus on Buffing
Early on, you want to focus on getting to your focus limit, gathering items and allies, and earning some money. Later, there will be no time to spare in the game, so gather those resources now and use them when the time comes. Move towards areas with the items you are looking for, for example, going to the general store because the encounters would most likely have the common items and weapons for you.
Managing the Bad (Rather Than Focusing on Winning)
When I played, I soon realized that my mindset had shifted from trying to win to trying not to lose. Focus on managing the doom, monsters, and anomalies rather than trying to gain as many clues as possible. In this edition of Arkham Horror, there are much fewer clues than before, so try to survive and wait for the opportunity to pick those clues up rather than forcing the situation.
Expansions
These are unnecessary, but they provide more scenarios to solve and eldritch beings to triumph over.
Dead of Night
This brings in two new scenarios: encounters in every location, monsters, anomalies, and four new investigators armed with unique spells and items. This is more cult themed as the scenarios include people who act in the dark serving an alien moon or their dark master.
Under Dark Waves
This expansion brings you to Massachusetts, with two double-sided map tiles and an additional eight investigators to bring to the party. This has four new scenarios, over 150 encounters, and new content assets. Being water themed, this one pulls you deep into the Cthulu mythos.
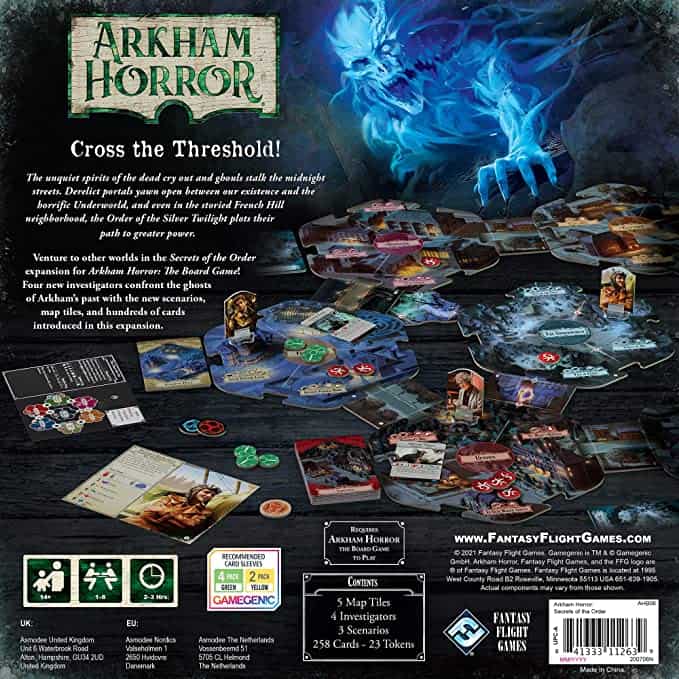
Secrets of the Order
This is a significant box expansion that moves the investigation to French hill, even leading into the Underworld’s depths. It brings two double-sided map tiles. Join four investigators, new challenges, and monsters, along with items, assets, and encounters. This is an entirely new ball game and well worth the expansion.
FAQ
Question: How many editions of Arkham Horror are there?
Answer: There are three editions and one card game.
Question: What do remnants do in Arkham Horror?
Answer: Remnants do various things, from being a currency in specific encounters to ensuring no sanity damage when casting a spell.
Question: How do you gain clues in Arkham Horror?
Answer: In this edition, you can only get clues through encounters.
Conclusion
While this game may look complicated, once you get into the game’s motion, you will find it easy to keep up with. It is a mentally stimulating game that will make you feel the pressure and challenge while still having fun. I would recommend this game if you are interested in the lore of H.P.Lovecraft or in board games that require teamwork and planning.
Recommended reads:
- Ticket to Ride Asia Guide
- A Complete Overview of Ticket to Ride
- Best Ticket to Ride Strategies
- A Complete Overview of Ticket to Ride New York
- Best Ticket to Ride Games Ranked - June 26, 2023
- Best RPG Board Games - March 22, 2023
- Best 2000s Board Games - March 8, 2023